RUNDE'S ROOM: Task Cards

Showing posts with label Task Cards. Show all posts

Making Morphology Meaningful: What Works for Me to Teach Prefixes, Suffixes & Roots

03 August 2025

Let’s be honest — teaching morphology can feel… dry.

I’ve tried a lot of approaches over the years: word lists, anchor charts, workbook pages, even sorting activities that took way longer to prep than the payoff was worth. Sometimes it felt like students could memorize a prefix, but had no idea how to actually use it in context. And don’t even get me started on trying to keep students engaged after back-to-back reading and writing blocks.

I knew something needed to shift.


What is Morphology (and Why We Need to Teach It)

Morphology is all about understanding word parts — prefixes, suffixes, and roots — and how they work together to form meaning. It’s not just about spelling; it’s about unlocking vocabulary, improving reading fluency, and boosting comprehension across subjects.

Current literacy research agrees: teaching morphology explicitly improves reading success, especially for upper elementary students who are encountering more complex words across the curriculum. Morphological awareness helps students decode unfamiliar terms, understand nuance, and transfer knowledge across subject areas.


But for that to happen, the instruction needs to be intentional, scaffolded, and a little more exciting than a worksheet.


Why Task Cards Work (and Why I Use Them)

Task cards aren’t just trendy — they’re backed by solid pedagogy. They support:

  • Active engagement through short, focused tasks

  • Differentiation with flexible grouping or independent pacing

  • Spaced practice without the monotony of drill-and-kill

  • And maybe most importantly… movement

I use task cards as part of a structured scavenger hunt that gets students up, moving, and thinking. It’s perfect for breaking up longer chunks of seated work (like a reading or writing block) and helps bring some much-needed energy into the middle of the day — all while reinforcing academic vocabulary in a meaningful way.


Why I Created This Resource

I just couldn’t find what I was looking for.

I wanted a morphology resource that struck the right balance:
✔️ Clear and explicit instruction
✔️ Student-led discovery and practice
✔️ Built-in movement in a structured and predictable format
✔️ Actually engaging for real-life students

So, I made it.

Each set in this Morphology Task Card Series includes:

  • A learning goal and success criteria

  • A visual anchor chart

  • A minds-on mini lesson to kick things off

  • 12 task cards across all four Ontario Language achievement chart categories

  • A student answer page + answer key

  • A journal prompt, exit slip, and tracking sheet

  • Tips for consolidation, intervention, or extending the learning

Every piece is designed to be meaningful, scaffolded, and low-prep — just print and go.


What’s in the Series So Far?

There are currently 5 morphology sets available:

  1. High-Frequency Prefixes

  2. Prefix – Meaning and Nuance

  3. Prefix Challenges & Review

  4. Common Suffixes

  5. Suffixes and Parts of Speech

Each set builds on the last, helping students make deeper connections as they explore word structure and meaning. Coming soon? Root words, spelling through morphology, and vocabulary in context — all designed with the same practical, student-centered approach.


Try One Out (and Catch the Sale!)

If you’ve been looking for a morphology resource that blends structure, movement, and deep understanding — I’d love for you to try one out!
The whole series is on sale August 5th–6th during the TpT Back to School Sale, so it’s the perfect time to grab your favourite and give it a go.

Click HERE to explore the Morphology Series on TpT!

Bundle coming soon — grab the sets now and the rest will build right into it!

Math Scavenger Hunts

13 August 2018
Runde's Room:  Math Scavenger Hunts
One of my favorite ways to use task cards in the classroom is to hide them around the classroom, so students have to hunt for the cards before they can complete each task.  Cards are numbered, so students can complete the tasks in any order.  It's just a little way to get them out of their seats and moving around the room, and it's a super easy way to add a little more fun to the activity.  It only takes a couple of minutes to do - I'll hide the cards in the morning or during a break - when the kids aren't in the room - in the bookshelf, behind cupboard doors, under a desk top, on the back of a chair ... anywhere except inside desks or books.

This way of hiding task cards led to me creating these Math Scavenger Hunt Task Cards.  One of our school goals is to continue to integrate more technology into our activities, so I made these cards as more of a "digital scavenger hunt" - students will collect pictures of the objects or numbers they need to find according to the task cards, rather than collect the actual object or number.  Students can take pictures of the objects on any device - depending on the number of devices you have available, you could have students complete this activity individually, in pairs, or in groups.  I only have 5 iPads in my room, so we'll definitely be working in groups.  You can have students work only in your classroom to complete the tasks (or find the objects), or they can work in a larger area of the school if you have access to one.  Students should hunt through books, magazines, classroom walls and resources, newspapers, anywhere and everywhere, while trying to find the different objects.

Runde's Room:  Math Scavenger Hunt Task Cards
Students could use the pictures they collect as evidence they have completed the tasks.  They could also display their picture galleries to other groups during a "gallery walk" activity.  You could also take it a step further and have students create a quick slideshow of their scavenger finds.  There are many possibilities.  Pictures could also be printed and added to students journal responses as a reflective bulletin board.

This Scavenger Hunt Task Card Bundle contains 4 different scavenger hunt resources - Place Value, Math in Real Life (a good overall review of math terms), Classroom Geometry, and Classroom Measurement (two versions of this resource are included - one with metric units and one with customary).  Each resource makes a great diagnostic activity at the beginning of the unit, or a review before a summative task.  They are also an easy low-prep activity, perfect for your sub tub, or math station resources.

Each resource contains a Minds-On Task I like to use whole group to introduce the activity, 12 task cards, a journal prompt (this is optional - it could also be a good discussion question or activity at the end of the task), and a student answer page.

Runde's Room:  Math Scavenger Hunts

You can take a peek at my Math Scavenger Hunt Bundle by clicking HERE or on any of the images in this post.

0

5 Activities to Teach Mean, Mode, Median

13 July 2016
5 Fun Hands-On Activities to Teach Mean, Mode and Median that your students will LOVE!
Today's 5 Activities to Teach ... is all about Mean, Mode and Median.  Get your students exploring these concepts in an interactive and hands-on way with some of these ideas.

1.  Interactive Math Journals - My favorite journal entry for mean, mode, median and range uses cue cards and a brass fastener.  We write definitions for each of the terms on the cards, then fasten them all together and stick them to the right side of the page.  On the left side of the page, we use a set of data and actually work through solving for mean, mode, median and range.  Getting this done early in the unit gives the students something to reference for the rest of the year when they encounter these concepts.  You can read a little more about this journal entry HERE, or find the full lesson in my Interactive Math Journal 2.

5 Fun Hands-On Activities to Teach Mean, Mode and Median that your students will LOVE!

5 Fun Hands-On Activities to Teach Mean, Mode and Median that your students will LOVE!2.  OREO Day!!! - Ummmm ... math and oreos ... life is good.  This is one of my favorite days in the classroom - hands down.  And it's not even the cookies - it's the stacking competition that I love (OK ... maybe it's the cookies, too).  Students get paired up (each pair needs a package of cookies - I sent a note home asking parents to send in cookies and received more than enough).  Each student then takes a turn stacking.  Rules are - using one hand only, and you cannot move a cookie once it has been placed on the stack.  That's it.  Keep stacking until your tower falls.  The partner not stacking counts the cookies in the stack.  I drew a big chart on the whiteboard to record the # of cookies.  Each person got 2 attempts, so we had a large set of data when complete.  Then, together we found the mean, mode, median and range with the data.  Notes on this activity are included in my Interactive Math Journal, but you can also read more about it in my blog posts HERE and HERE.
5 Fun Hands-On Activities to Teach Mean, Mode and Median that your students will LOVE!


3.  Hey Diddle Diddle - A few years ago I came across a great little rhyme for remembering how to solve mean, mode, median and range.  It is based on the rhyme, Hey Diddle Diddle, The Cat and the Fiddle.  Every time we do a mean, mode and median activity in class, we recite it.  I made a little printable with the rhyme, with a space for you to enter any set of data and room to solve for MMM.  You can grab a copy of it HERE.

4.  Use REAL Data - And use it often.  Don't just teach it and leave it.  Keep the learning going with real data throughout the year.  I like to do "Triple M" assignments (Mean, Mode, Median) whenever we get back testing data - whether it is a small quiz, or larger assignment where percents are given.  It's valuable practice for solving mean, mode and median, and gives students an idea of where their own mark is compared to the average mark in the class.  To do this quickly with grades 4-5, I use the Hey Diddle Diddle printable above, and write the scores in the data box in random order before I photocopy the page.  I also have a few larger assignments that I used with my students in grades 5-7, where students must plot the results on a line plot graph and reflect on the numbers in written prompts.  You can take a peek at those assignments (which also contains editable Word files) HERE.

5 Fun Hands-On Activities to Teach Mean, Mode and Median that your students will LOVE!5.  Stations, Stations, Stations - Again, since coming up with more math stations for next year is my main purpose for these posts, I've got some more station ideas for you.  Pull out the dice or cards and the whiteboards, and give your students a task like "Choose 5 cards and find the mean, mode and median.  Let a partner check your work.  Then switch."  Or "Roll 10 dice to make a set of data.  Find the mean, mode and median.  Then, re-roll two of the dice and see how that changes your data."  Have students complete a number of rounds at each station before moving on.  Add a little more fun to the stations by using a set of "fancy" dice, or giant cards.  I just got a set of huge 5 x 7 cards from Amazon that I can't wait to use (affiliate link at the bottom of the post).
5 Fun Hands-On Activities to Teach Mean, Mode and Median that your students will LOVE!

5 Fun Hands-On Activities to Teach Mean, Mode and Median that your students will LOVE!I also made a set of Mean, Mode and Median Task Cards to use at a station.  This resource includes a full page Minds-On Task which I use to introduce the station, a set of 12 task cards (ranging in difficulty from solving from a set of numbers, to taking the data from a graph, to finding the missing value in a set when given the mode or median), plus a journal prompt you can use for a written or oral response.  It can also be used as an exit slip.  While my students are rotating through their stations, I like to work with small groups at a task card station - and then collect the recording pages for a formative assessment. You can take a peek at this resource HERE or by clicking on the picture below.  

And lastly, if you have computers as a station, this LINK  from Technology Rocks has a few fun online games to practice MMM.  

That's about it for today.  Please leave a comment below if you have a favorite station idea to teach mean, mode and median.  And be sure to check out my other posts for 5 Activities to Teach ... 


0

5 Activities for Teaching Fractions

04 July 2016
5 Hands-On Activities for Teaching Fractions that your Students will LOVE!
5 Activities for Teaching Fractions

I've got another fun 5 Activities to Teach ... post for you today.  This one is all about fractions!  I LOVE teaching fractions - there are so many engaging ways to get your students involved in their learning in a hands-on way!


1.  Fraction Pizzas - We started off our Fraction Unit this year with a super fun Fraction Pizza themed day.  Oh my goodness - this is definitely something I will continue to do - we ALL had a blast!  We started out by making Paper Plate Fraction Pizzas.  This is something I've done before in our Interactive Math Journals (there is a full entry in my Math Journal resource, or you can read more about it and other fraction journal ideas in my blog post HERE.)  This time we completed the pizzas outside of our journals so we could display them for all to see (we glued our fraction pizzas to a paper with a napkin and some cutlery for a fun display).  Under their napkins, students had to write about the equivalent fractions they used in their pizzas.

5 Hands-On Activities for Teaching Fractions that your Students will LOVE!

5 Hands-On Activities for Teaching Fractions that your Students will LOVE!
But we didn't stop there - we actually MADE our fraction pizzas.  I had all the ingredients out, and divided the class into 3 teams.  We made chef hats out of construction paper and tissue paper for the full effect.  We did a full-out FoodTV competition - with each team working in relay style to complete the pizzas - each student had two minutes to work on their task before they tagged the next person on their team to take over - continuing until their pizzas were completed.  They had to sauce the pizza (we used premade pizza crusts), cut the meat and veggies (with plastic knives), shred the cheese - all according to the recipe cards we had (which was the same recipe we used to make our paper plate pizzas).  When all the teams were done, we baked the pizzas and had a fun lunch together.

5 Hands-On Activities for Teaching Fractions that your Students will LOVE!But ... we didn't even stop there.  We saved the best for last - we made CANDY pizzas for dessert!  I had a variety of candy out on display and gave the three groups 10 minutes to meet and plan their recipes for their candy pizzas.  We used the premade crusts again (but they weren't the most delicious for the candy pizza, so I think I will do cookie dough next time) and white icing for the "sauce" and let the students take over.  This fun fraction pizza day was seriously the best kick off to our fraction unit - and it was one of my students' top memories from the year.

If you want to give this a try with your class, I've uploaded the pizza recipe and candy pizza cards to google drive - you can download a copy for yourself HERE.  (I also plan on writing a more indepth blog post all about our Pizza theme day SOON).


5 Hands-On Activities for Teaching Fractions that your Students will LOVE!
2.  Fraction of the Day Question - Fractions are just too important a concept to keep confined to one unit during the year.  I have a little spot on my whiteboard where I write a "real-life" fraction question each day for students to answer.  They solve on a sticky note and place it under the question (they usually do this first thing in the morning).  Sometimes they draw the fraction, sometimes they find equivalent fractions, sometimes they convert to decimals or percents ... just keep changing it up.  The denominator changes based on the number of students actually present that day - so that keeps it fresh, too.  I don't mark the individual responses - it's just a practice question each day.  Taking it up takes less than 5 minutes, and keeps fractions in their heads all year long.

If you don't have room on a whiteboard, this would be perfect on a little display chalkboard, or even those awesome little lightboxes I'm seeing all over instagram this summer.

5 Hands-On Activities for Teaching Fractions that your Students will LOVE!3.  Fraction Clothespins - My favorite activity for comparing and ordering fractions is using clothespins on a clothesline.  I use little sticky labels for writing fractions on one side of the clothespin, and the decimal (or percent) on the other side.  Just hang a piece of string up in the classroom, and have students pick a clothespin or two to place on the line.  Equivalent fractions are clipped to each other.  I usually do this in two "rounds".  I give them time to put the clothespin up first.  Then, when everyone is done, I give them time to look at the clothesline and make any corrections that are needed (they can change their own pin, or any pin on the line).  If they are changing a pin, they have to justify why.  Quick and easy ... and so hands-on effective.  You can read more about this activity in a blog post I have HERE.

4.  Fraction Circle - We love using math circles in my class.  It gets us up and moving, and has the students collaborating with their friends to complete the task on the card.  We usually do the math circle the way it's intended, in a circle format, giving out cards to each of the students, but I put two fun twists on our Fraction Circle this year.  I used cards as exit slips or transition cards after different activities - calling out one or two cards for students to complete at various times during the day.  We also used the cards for a super fun board game activity.  I projected a game board onto my whiteboard (there are some fun ones online HERE) and pulled out the giant dice.  I split the class into two teams.  I read the first team a fraction card and gave them 1 minute to complete the task.  If they were correct, they got to roll the dice and move ahead on the game board (we used the whiteboard markers to track our place on the whiteboard).  Then the second team got to go.  Repeat until you're finished.  This was SO MUCH FUN!  And you can use almost any set of task cards or math circle for this.  I plan on printing a life-size gameboard through Vistaprint this summer so we can have more fun with games like this.

5 Hands-On Activities for Teaching Fractions that your Students will LOVE!

5 Hands-On Activities for Teaching Fractions that your Students will LOVE!5.  Stations, Stations, Stations - I found that using lots of math stations and centers was another hit during our fraction unit.  The students LOVED the fun, hands-on activities they were doing, and I LOVED that they were kept busy, engaged, and learning while I had time to work with small groups for some extra reinforcement.  In the task card stations, I had pattern blocks and plastic building blocks set out for students to work through the tasks - with the students handing in their recording sheets when complete for a quick formative assessment.  I also made a station with dice - after the first day I added in a more difficult set of dice (with larger numbers than the standard dice) - I called them the "challenge dice" and I couldn't believe what a hit they were.  I'm not sure if it was because I let them use the "special dice" or because I called it a challenge, but whatever it was, I'll take the results.  I posted all our Fraction Math Center task cards we used in this unit into a bundle you can find on TpT HERE.

Dominos and whiteboards were another fun math station activity.  Dominos are perfect because they are already in fraction format.  These were also the perfect activity for me to work with individual students or small groups.  The students were having fun and the "work with teacher group" didn't seem like work at all.

5 Hands-On Activities for Teaching Fractions that your Students will LOVE!Simply pick some random dominos from the tin and arrange in order from least to greatest for comparing fractions and finding common denominators.

5 Hands-On Activities for Teaching Fractions that your Students will LOVE!Or, work with a partner (or the teacher) and play Fraction Domino War.  Each person places a domino on their side of the whiteboard, and the student with the greatest fraction wins both dominos.  The student with the most dominos at the end wins.
5 Hands-On Activities for Teaching Fractions that your Students will LOVE!Pull a random domino from the tin and make equivalent fractions.

5 Hands-On Activities for Teaching Fractions that your Students will LOVE!Or, place the domino so that the higher number is on top (the numerator) and make mixed numbers from the improper fractions.
 Lastly, during our math stations, I added in another accountability factor this year.  When we had a large block of station time, with students visiting a number of stations, they had to complete a sticky note exit slip after they finished at each station (each station had a stack of different colored sticky notes at it).  They had to write something specific they learned about fractions at that particular station.  It did take a little modelling at first to teach how to write something specific to "prove" their learning ... but soon we went from "Today I learned about improper fractions" to "Today I learned how to change an improper fraction to a mixed number at the domino station.  You divide the numerator by the denominator to find the whole number, and then you have the fraction left over.  5/2 = 2 1/2."  At the end of all the stations, students collected all their sticky notes on the board, stapled them together, and handed it in for a math reflection.

5 Hands-On Activities for Teaching Fractions that your Students will LOVE!


Whew.  That's 5 ... and that's a lot.  I told you we had a ton of fun with hands-on fractions this year.  Please leave a comment below with some of your best hands-on fraction activities you like to do in the classroom.  We can all benefit from the sharing of ideas.  Be sure to check out all my "5 Activities for Teaching ..." posts HERE.


4

5 Activities for Teaching Angles

27 June 2016
5 Activities to Teach Angles
5 Activities for Teaching Angles

I love teaching angles - it's short and sweet, and the students always have a lot of success with it - which makes it all the better.  :)


1.  Interactive Math Journal Entry - this is one of my all-time favorite math journal entries.  I use this as a full-class introduction to angles - not as a station.  That way, I can gauge what knowledge they come to me with, and we can talk about what we will learn while studying angles.  This entry is included in my Interactive Math Journal Resource.  If you download the free preview, you can grab this lesson in its entirety.  You can also read about this activity in a blog post I have HERE.  
5 Activities to Teach Angles

2.  Tables, Whiteboards and Washi Tape -
Hands-on activities to teach angles
Get the tape out and get ready for some hands-on fun!  (You don't have to use washi tape - masking tape works perfectly fine, too).  To introduce angles at the beginning of our unit, we did a full group lesson on classifying angles.  I taped up a table, armed students with a whiteboard marker, and let them classify (acute, right, obtuse, and straight) as many angles as they could.  They LOVED this activity!  So everyone could fit around the table, I paired up the students so they could take turns marking angles on the table.

Hands-on activities to teach angles


5 Activities to Teach AnglesOnce we were masters at classifying angles, we could move on to measuring angles.  This is such a fun activity - perfect for practice at math centers!  We just used some fun washi tape to "draw" lines on our whiteboards.  We used 5 pieces of tape - and I told them the tape had to be straight and go across the board from one side to the other.  From there, students measured the angles made by the tape.  You could just leave it at this, but I turned this activity into a game by pairing up the students.  Each student had a different color of whiteboard marker.  The first student measured an angle (any angle of their choice) and wrote down the measurement using their color.  Then, the second student checked the answer.  If it was correct, they left it alone.  If it was incorrect, they erased the first answer and wrote the correct answer using their color (the second student).  The second student then got a chance to pick and measure an angle of their choice - recording the answer in their color.  At the end of the activity, the student with the most answers in their color (most correct answers) wins!  

    5 Activities to Teach Angles

    3.  TIME for Angles - This is a quick activity I do at various points throughout the day while we are studying angles.  (I also throw in a few days here and there just to review the concept).  At any given time, I ask the students what time it is on our analog clock (that is good practice just in itself).  I record the time and ask the students what kind of angle it is - acute, right, obtuse, straight.  I  also ask them to estimate the size of the angle.  When doing this, the students realized that each 5 minute interval was 30 degrees - so helpful for estimating.I just keep a running record on the board by the clock and try to get in at least 5 questions throughout the day.

    5 Activities to Teach Angles
    4.  What's in a Name? -  This one is another great station activity - and will also make a great math bulletin board display when students are complete.  I like to use grid (graph) paper for this activity, but it's not necessary.  Have the students write their names in block letters (all straight lines) on the paper.  Then, using a protractor, have the students measure all the angles they can find in their names.  This is also a great way to start to introduce adjacent angles (and complementary and supplementary angles).

    5 Activities to Teach Angles
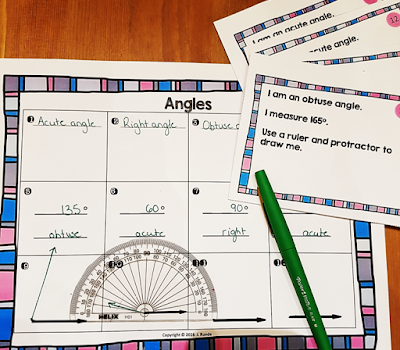
    5.  Angle Task Cards - This is another great station activity.  These Angle Task Cards contain a Minds-On Task which I like to use to introduce the concept to the whole class, with each student completing the challenge task on a whiteboard or paper.  The twelve task cards can then be completed independently as part of a station, with each student completing the recording sheet to hand in for a formative assessment.  The best part about the recording sheet is that it is perfectly matched up to the answer sheet, so you only need to place the recording sheet over the answer sheet in a light area (like a window) so you can see the answers through the page and easily mark without having to measure each angle.  These task cards also make great exit slips after a lesson.  You can take a peek at them on TpT by clicking HERE.

    5 Activities to Teach Angles


    Angle Relationships Task Cards

    I also have a more advanced set of task cards for angle relationships - finding the unknown angles with the properties of complementary and supplementary angles, opposite angles, and interior and exterior angles.  You can take a peek at them by clicking on the picture to the right or HERE.

    What are some of your best teaching ideas or activities for angles?  I'd love for you to leave a comment below to share with us.

    For more 5 Activities to Teach .... posts, click HERE.
    9

    Building Perimeter and Area

    12 March 2016
    Perimeter and Area
    Recently I had seen some great ideas about teaching fractions with those fun little plastic building blocks I'm sure you've all stepped on in the middle of the night.  Right away I knew I wanted to introduce fractions to my students with them, so I got online and ordered myself a standard box of them (most of you probably have more than enough lying underfoot in your house).  I was so excited when they came in, even though fractions are still a few weeks away for us.  And then, while teaching perimeter and area early this week, I thought - WHY am I not using the building blocks for this, too - how perfect would it be?

    And perfect it was.  My class NEEDS that hands-on exploration - every class really does, but I've found that this one needs it just a little bit more.  They were so excited to learn the concepts this way - and couldn't believe they were getting to use "toys" in math.  Doesn't get much better than that.  So, "Building Block Math" was born.  

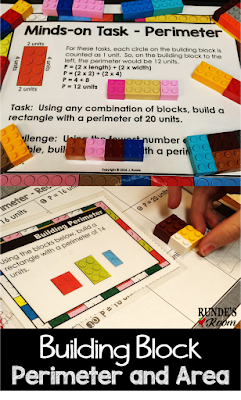
    We started out with a minilesson through a Minds-On Task.  I just projected the Minds-On page under the document camera for students to see.  We went through how to find perimeter and area with the building blocks (counting each raised circle as one unit), and I reminded my students about the formulas (perimeter and area of rectangles aren't new concepts for my 4th and 5th grade students, but digging deeper into comparing perimeter and area is).  I then let the students work in pairs to complete the task and challenge task on the page.  As each pair finished, they could come up and place their blocks right on the page so their work was projected for all to see (they LOVE this).  (Note - We covered the perimeter resource first before we moved onto area).

    Perimeter and Area

    Perimeter and Area

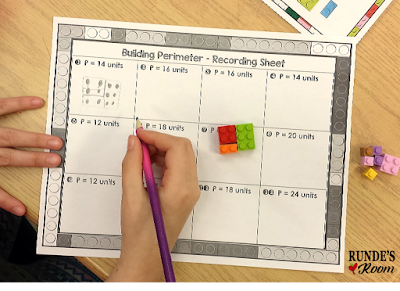
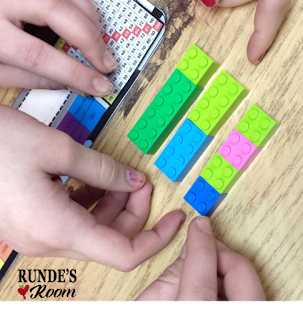
    Perimeter and AreaFollowing the minds-on task, students were allowed to continue working with their partner (but you could easily do this as a math center or station, or an independent task) to complete the 12 task cards for each concept.  The task cards have the students building the different rectangles (or irregular polygons - there are 2 cards for this) with the required perimeter or area using all the blocks shown on each card (the color of the block doesn't matter, just the size).  This was so fun because it was such a brain challenge - requiring students to put the pieces together like a puzzle so that they could get the correct answer.  Each resource has a recording sheet for the students to draw their answers on, as well as an answer sheet.  The answer sheet could be used at the math station for students to self-check their answers, or students can hand in their completed recording sheets for a formative assessment for you.

    Perimeter and Area
    Perimeter and Area
    Perimeter and AreaWe've just finished up both perimeter and area resources, and next week (after our Spring Break - yay!) we'll dive into Comparing Perimeter and Area.  This resource really gets students thinking as they are asked to build all rectangles with a certain perimeter and different areas, or all rectangles with a certain area and different perimeters - and then compare the "shapes" of the rectangles.  
    I only bought one standard box of these building blocks for the students - and there are more than enough pieces in the box for all the students in the class to work with (I'll include an affiliate link to the box I got below).  For super easy prep, I just put the whole box in a central location in the classroom.  Students grabbed a handful before they started working, and if they needed more or different pieces, they just got up to get some more.  You could bag up some of the pieces for each pair to use before hand, but this was quicker and easier, and got the students up and moving a little more, instead of just sitting at their seats (again, something my class needs a little more of this year).  

    If you're interested, you can check out these resources through the links below.


    1