Math Journal Sundays
19 February 2012
GOOD Sunday morning! Kids are playing with their Barbies (not so quietly this time), I've got my coffee, and life is good.
I've got another full lesson to go along with our journal foldables from this week. We're still in our measurement unit - studying area and perimeter - hoping to finish up next week. Last week I shared a lesson we did that had the students working towards the realization that when given the same perimeter, rectangles closer to a square shape have the smallest area. They also discovered the formula for the area of a triangle.
This week one of our hands-on lessons was about the relationship between parallelograms and rectangles. I had them construct a rectangle with a perimeter of 90 cm (this was the same perimeter they were working with last week when they constructed rectangles - I did this so students who had difficulty the first time would have a chance to master it this time).
Once they had made their rectangles, they had to solve for the perimeter and area (using the formulas) on the front of the rectangle.
Now this was (apparently) the tricky part. Without any direction or hints from me, I told them to decompose their rectangle to make a parallelogram. I did tell them they had to keep the area the same (meaning they couldn't have any scraps of paper left over).
Well, it took a while, but they finally got it. They cut a small triangle off one side, and taped it to the other side. Once all the students accomplished this (we went through A LOT of tape). I had them solve for the perimeter on the back of their shape. They were shocked to find the perimeter was different - so many of my students thought they had made a mistake and went back to measure again. Which led us to the big idea ... diagonal lines are longer than straight lines. When they went to solve for area, many of them wanted to use the diagonal as their width, and were confused again when their parallelogram didn't have the same area as their rectangle. I reminded them about triangles, and how we use the height to find area ... and that was all I needed to say. The students then found the area using the base and height.
Here are all our parallelograms posted at the end of the lesson. The students all found it pretty amazing all these different sizes and shapes started with a rectangle with a perimeter of 90 cm.
We ended the class with a foldable to show the relationship between rectangles and parallelograms. They started with a rectangle they folded in half. On one of the halves, they turned the rectangle into a parallelogram, using the same method they had in the lessons. They then measured and labeled the dimensions, and solved the perimeter and area of both.
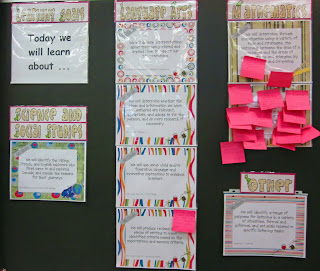
And, judging from the exit slips on our learning goals at the end of the day, I think they liked it and learned something ... or maybe it's just because math is our last class of the day ;)
Happy, Happy Sunday!!! We're off on Monday for Family Day in Ontario! YAY for long weekends!
loading..
Subscribe to:
Post Comments (Atom)


The exit slips on the learning goals are such a great idea! I love doing hands-on many exploration too. So much learning going on :) Thank you for sharing.
ReplyDelete~Stephanie
Teaching in Room 6
Thank you for sharing! It's great to see other teachers in the same province working on the same things. Have a great Family Day!
ReplyDeleteI love your learning goals area with the sticky notes as exit slips. What a great idea!
ReplyDelete~Maggie
I really wish I could be a fly on your wall to see you in action! I tried the 90cm perimeter activity that you blogged about last week and it didn't come off as easily as I had wished. I think my mistake is that I started with this lesson instead of using it after we had spent more time with area and perimeter.
ReplyDeleteSeriously, consider taking a video...I'd be glued to the screen. Really.
Elizabeth
Fun in Room 4B
Thanks for sharing. Hopefully I'll remember to let you know how this lesson goes when I do it in a couple of more weeks in my 6th grade class. Thanks for the pictures too. It's a visual explanation.
ReplyDeleteAWESOME ideas! I will be using these when we do geometry!
ReplyDelete☼Kate
To The Square Inch
Thanks for sharing! I will have to use this when we begin perimeter and area next week. I love the foldable!!
ReplyDeleteTake Care and enjoy your day off!
Krista
stellar-students
I love your Math Journal Sundays. Such great ideas! Thanks for sharing them!
ReplyDeleteVery cool....will be doing this with my kids!
ReplyDeleteThank you very much for the lesson on parallelograms and rectangles. Your directions are such a big help. Many more thanks for taking the time to write about it and include photos. Math on!!!
ReplyDeleteThank-you, everyone!
ReplyDeleteThat was great exercise on parallelograms and rectangles and I think such exercise should be shred by everyone here.
ReplyDelete